Tuesday, December 21, 2010

Rich Rum Fruit Cake

I wanted to try a different fruit cake this Christmas and hence was looking for the perfect recipe. Finally, while browsing through various interesting blogs on the internet, I came across this particular recipe which really caught my attention. I wanted to give it a try. I must say that I have found the perfect Christmas fruit cake which is so moist and delicious.


I am sure you all are going to enjoy this Rich Rum Fruit Cake as much as I do.

Monday, December 20, 2010

Sweet Corn Chicken Soup


This is one of my favorite Indo Chinese soup. I order it all the time at restaurants. This soup hardly takes any time to make if you have ready chicken stock with you. But, I wanted to make the stock at home. The homemade stock gives the soup a nice taste.


Preparation time: 20-30 minutes
Serves: 4

Ingredients:
Chicken Stock:
1 small packet of chicken drumsticks (about 12 small pieces)
1 cup celery chopped
1 tsp finely chopped ginger
1 tsp finely chopped garlic
2 carrots diced
1 onion diced
salt to taste
4 cups of water

1 can of cream style sweet corn
1/2 cup of cooked shredded chicken
1 egg beaten
2 tbsp soy sauce
2 tbsp of green chilli sauce
2 tbsp of hot and sweet chilli sauce
2 stalk of green onion diced
3 tbsp of corn starch dissolved i a little water
1 tsp sesame oil
1 tsp pepper powder
1 tsp chilli flakes
salt to taste

Method:
  • Put all the ingredients for the chicken stock in a pressure cooker and close the lid and cook on medium heat for 2-3 whistles or until the chicken is cooked.
  • Strain the liquid from the cooker in a large bowl
  • Keep the cooked chicken pieces and separate the chicken from the bone, shred it nicely and discard the veggies.
  • In a big bowl, combine the stock with the cream style sweet corn.
  • To this add, salt, pepper, chilli flakes, all the sauces and bring it to a boil
  • When you see it boiling, add the shredded cooked chicken to it.
  • Then add the beaten egg slowly and keep stirring until the eggs form fine threads in the soup.
  • Finally, add the cornstarch and you will see the soup thickening.
  • Let it cook for 2 minutes and then you can take it out and garnish it with some sesame oil, green chillies soaked in vinegar and diced green onions.
Note: You can make the vegetarian version by using vegetable stock and using cooked vegetables instead of shredded chicken.

Tuesday, December 7, 2010

Rose Cookies


The holiday season is on and soon it is going to be Christmas. Love this season, especially here in Canada. It is so beautiful to see the houses and malls decorated and also the experience of a white Christmas. Simply amazing!!! This year I decided to start my Christmas sweets by making rose cookies first. This is something that I have tried for the first time. I remember my mom making this for us every Christmas and they were so delicious and crispy that most of it was over the minute she made it :)

Preparation Time: 20 minutes
Makes: Approx. 50-60 rose cookies

Ingredients:

1/2 kg all purpose flour (sieve and keep it aside)
1 tin of coconut milk
3 eggs (beaten well)
350 gms of finely powdered sugar
1 tsp vanilla essence
1/2 tsp cardamom powder
1/2 tsp nutmeg powder
a pinch of salt
oil for deep frying

Method:
  • Mix the coconut milk and the sugar together in a bowl. Make sure that the sugar has dissolved well in the coconut milk.
  • To this add the beaten eggs and mix well.
  • Then, add the salt, vanilla essence, cardamom powder and nutmeg powder
  • Finally, add the all purpose flour little by little, thereby mixing the batter well with the spoon in order to ensure that no lumps are formed
  • The consistency of the batter should be neither too thick or too thin. If you find it too thick, you can adjust the batter by adding a little water to it.
  • Heat oil in a deep bottomed pan and while doing that, insert the rose cookie form (easily available in the specialty stores) in the oil and let it heat simultaneously.
  • When the oil and the form is hot enough, take the form out from the oil and dip 3/4th of the form in the batter and quickly dip it in the hot oil moving it slightly. You will see the batter leaving the form.
  • Repeat the procedure again quickly and fry them for 3-4 seconds on either side and take them out and drain the oil from the rose cookies.
  • Always make sure that the form is hot enough before dipping it into the batter, else it won't hold the batter.
  • Crispy rose cookies are ready to eat.
  • Store them in an airtight container.

Tuesday, November 23, 2010

Corn Bread


This is my sister's recipe. She gave it to me last Thanksgiving and it turned out really good so thought of sharing it with you all. Corn bread is one of the popular American thanksgiving dishes.

Preparation Time: 15 minutes
Baking Time : 30-40 minutes
Serves: 8-10

Ingredients:

11/3 cup sugar
8 oz melted butter
4 eggs
1 tsp baking soda
2 cups butter milk
2 cups cornmeal
2 cup all purpose flour
1 tsp salt

Method:
  • Mix sugar and melted butter in a bowl.
  • Beat the eggs and add it to the sugar butter mixture and fold it well.
  • Add baking soda to the buttermilk and mix it with the above mixture
  • Finally, add the cornmeal and the flour and mix well till you see no lumps. It should be a smooth batter.
  • Grease the parchment paper and pour the batter in the tin.
  • Bake it 375 degree F for 30 -40 minutes
  • Let it cool and then cut it into pieces and serve.

Pumpkin Pie


We had our thanksgiving in Canada on 11th October but, I could not put up any recipes then as I was busy studying for a short term HR course. So, I thought of putting it now, as my American friends are celebrating their thanksgiving tomorrow.

This recipe is not my original. It was written on the E.D. Smith pumpkin pie tin. But, for all those who can't find this particular brand of pumpkin pie mix, you can simple use this recipe with any other brand.

I made this recipe for the first time and it came out really good. My friends enjoyed it and my daughter simply loved it.

Preparation Time : 10 minutes
Baking time: 50 minutes
Serves : 8

Ingredients:

To make 1 pie:

3 eggs
398 ml (1/2 can of 796 ml) of E.D. Smith Pure Pumpkin (you can use any other brand too)
1 cup packed brown sugar
1 tsp ground cinnamon
1/2 tsp ground nutmeg
1/4 tsp ground ginger
1/4 tsp salt
3/4 cup(175 ml) evaporated milk
1 (9 in/23cm) unbaked home-made or frozen deep dish pie shell

Method:
  • Beat the eggs lightly in a medium bowl.
  • Add pumpkin, sugar, cinnamon, nutmeg, ginger and salt; stir until well combined.
  • Blend in milk. Pour filling in a pie shell.
  • Bake at 425 degree F (220 degree C) for 15 minutes.
  • Reduce oven temperature to 350 degree F (180 degree C) and continue baking for 30 to 35 minutes, longer or until knife inserted in center comes out clean.
  • Cool and serve.

Thursday, August 26, 2010

Nutty Couscous Salad


Couscous is basically a Mediterranean dish. In general, I am not too fond of couscous and have never prepared it at home. But, one of my friend taught me this recipe. It was very easy to prepare and I liked this recipe of couscous, as a salad. I found it very nutritious and tasty. This recipe serves as a good side dish with fish, chicken or lamb or also a salad.

Preparation time : 20 minutes
Serves : 4

Ingredients:
  • 1 cup fine couscous
  • 11/2 cup water
  • 1 red bell pepper cut into small cubes
  • 1 tbsp parsley or coriander finely chopped
  • 1 small can of mixed beans
  • 2 tbsp of roughly chopped pecans or walnuts
  • 2 tbsp dried blueberry
  • 2 tbsp dried cranberry
  • salt to tast
Method:
  • Bring 11/2 cup water to a boil.
  • Pour this hot water over the couscous and cover and keep it for about 15 minutes
  • Then with the help of fork, gently flake it like the way you would handle cooked rice.
  • Drain the water from the canned mixed beans and rinse it nicely under the tap and mix these beans with the couscous.
  • Add all the remaining ingredients to the couscous and gently mix it together with a fork.
  • Chill it for about 1/2 hour in the refrigerator and serve it as a side or a salad.
Note: You can customize this salad and put in any ingredients of your choice. You can add grilled chicken breast to it if you like or some smoked sausages. Also serves as a great snack idea.

Baked Salmon with an Indian twist


Salmon is considered to be a health food by many because of its omega-3 fatty acids. A lot of health benefits are associated with its consumption. This is one of my favorite fish, here in Canada. However, I don't buy it often because it is too expensive. Whenever, I did buy salmon, I generally prepared it in a Continental style but was very surprised to know that our Indian spices also go very well with this fish. I had this dish at my friend's place and really liked the preparation. So, decided to share it with you all.

Preparation Time : 40 minutes + marination time
Serves : 4

Ingredients :

4 medium sized salmon steaks
3 tbsp of fish fry masala
salt to taste
1 tbsp lime juice
1 tsp of mixed Italian herbs
2 tbsp of fresh chives finely chopped
1 tbsp olive oil

Method:
  • In a bowl, combine fish fry masala, salt, lime juice, Italian herbs and chives together.
  • Pour in 1 tbsp of olive oil to form a thick paste
  • Apply this paste or marinade on both sides of the salmon steaks.
  • Let this rest in the refrigerator for about 2 hours.
  • Grease a baking tray lightly with olive oil
  • Preheat the oven to about 400 degree F and bake the fish for about 15 minutes on either side.
  • Serve hot with some nutty couscous salad.
Note: If you don't have fish fry masala, you need to combine 2 tbsp of red chilli powder, 1/2 tsp of turmeric powder, 1 tsp of cumin powder, 1 tsp coriander powder, 1 tsp garlic powder together. Combine this with the rest of the ingredients mentioned above and make a marinade for the fish.

Friday, July 30, 2010

Crab Cakes with Pickled Garlic & Cucumber Relish


One of my dear friend is suffering from Cancer. I have been accompanying her to the hospital for her chemo treatment. It is so sad to see some young kids going through this sickness. I have come across so many young and old people with different kinds of cancer and it is so sad to see them suffer. But, I must say that this experience has helped me appreciate life better rather than simply taking it for granted.

While waiting at the hospital for her turn, I was whiling my time reading a few magazines. Suddenly, I saw this interesting recipe of Crab cakes with Pickled garlic and cucumber relish. The picture looked so appetizing that it simply caught my attention. I immediately grabbed a paper and pen from the receptionist and wrote it down. Last week, I tried it out at home and it came out really good. So, thought of sharing it with all of you...

Preparation Time: 30 minutes + refrigerating time
Makes :12 crab cakes

Ingredients:

2 tbsp butter
2 green onions finely chopped
2 tbsp finely chopped celery
2 tbsp finely chopped red bell pepper
250 gms crab meat drained
2 eggs
juice of 1 lemon
2 tbsp mayonnaise
1 tbsp cilantro finely chopped
1/2 tsp sea salt
1/2 tsp black pepper
1/2 tsp cumin powder
1/4 tsp chilli powder
11/2 cups panko breadcrumbs - divided into 2 portions (I used regular breadcrumbs)
1 tbsp olive oil

Method:
  • Melt the butter in a pan. Cook onions, celery and red bell pepper for about 5 minutes and then transfer it into a bowl.
  • To this, add the crab meat, 1 egg, lime juice, mayonnaise, cilantro, salt, pepper, cumin, chilli powder, 3/4 cup panko breadcrumbs. Stir till it well combined.
  • Make 12 crab cakes and freeze it for about 2 hours or overnight.
  • Preheat the oven to 375 degree F.
  • Brush the baking sheet with olive oil
  • Beat one egg in the bowl and put the remaining panko breadcrumbs in another bowl.
  • Dip the crab cakes first into the egg and then sprinkle it with panko breadcrumbs and transfer them to the baking sheet.
  • Bake for about 10 minutes on one side and then flip it and bake again for another 10 minutes or until golden brown.
  • Serve hot with Pickled Garlic & Cucumber Relish on top.

Pickled Garlic & Cucumber Relish

Preparation Time: 15 minutes
Makes: 1/2 cup

Ingredients:

3 tbsp mayonnaise
2 tbsp cucumber finely chopped
1 tbsp red bell pepper finely chopped
2 tbsp mango finely chopped
1 tsp red onion finely chopped
1 tsp cilantro finely chopped
1/2 tsp Indian pickled garlic (you can find this in the Indian Grocery stores)

Method:
  • Mix everything together and serve it on top of the crab cakes.

Saturday, July 17, 2010

Strawberry Smoothie


Who doesn't love strawberries??? This delicious recipe is a perfect drink to beat the summer heat. You can make this with fresh or frozen strawberries and it tastes simply refreshing. Enjoy!!!


Preparation Time : 5 minutes
Serves : 1

Ingredients:

100 gm fresh or frozen strawberries cut into halves
1 tbsp sugar
1 tbsp lemon juice
1 cup low fat yoghurt beaten
a pinch of nutmeg powder
a sprig of mint leaf

Method :
  • Sprinkle the sugar on the strawberries and put everything together in the blender except for the mint leaves and blend it till it is smooth and creamy.
  • Garnish with mint leaf and a slice of strawberry.

Thursday, July 15, 2010

Beef Roast Sandwiches / Beef Chilly


I generally cook a lot of chicken. I am not too fond of beef or any other meat. But, one day this friend of mine taught me to make this delicious beef roast. I am not exaggerating, it is simply amazing. The best part of this recipe is that, you can make the beef roast and then have different variations of it. You can either make chilly beef out of the roast or beef roast sandwiches or simply have beef roast with some vegetables and mashed potatoes. So, just one simple recipe can help you prepare 3 days dinner. Isn't that so convenient?

So, here goes the recipe :

Preparation Time : 30 minutes
Cooking Time : 2-3 hours
Serves : 6 people

Ingredients:

for the Beef Roast:
11/2 lb beef eye of round
3 big onion chopped fine
3 big tomatoes chopped fine
2 tbsp ginger paste
2 tbsp garlic paste
4-5 kashmiri whole red chillies
1 tbsp clvoes
5-6 cinnamon sticks
2 tbsp cane or rice vinegar (if you don't have this, even regular vinegar would do)
salt & pepper to taste
Oil

Method:
  • First prick the eye of round with a fork on all sides. Then, apply salt all over the eye of round. Then, rub the ginger-garlic paste nicely on all sides. Finally rub the pepper and pour the vinegar on it and keep it aside for about 1/2 hour. (You could also marinate this the previous night and keep it in the refrigerator)
  • Heat 3 tbsp oil in a pressure cooker. When the oil is hot, throw in the cloves and cinnamon sticks, whole red chillies and fry for a minute or two.
  • Then, add the onions and fry till they turn translucent.
  • Then, add the tomatoes and salt and fry for about 10 minutes.
  • On top of this gravy, place the marinated beef and pour in 1/4 cup water and cover the cooker and wait for the pressure cooker to release 3 whistles.
  • After the 3 whistles, lower the heat and without opening the cooker, let it cook on slow flame for about 25-30 minutes.
  • After 30 minutes, remove the meat from the gravy and let it rest for about 5-10 minutes.
  • Increase the heat and thicken the gravy. This will take about 30 minutes to thicken the gravy.
  • After the meat has rested, cut it into thin long strips and mix it with the gravy.
  • Delicious beef roast is ready.
For Beef Chilly:
Ingredients:

2 big onions cut into thick round circles
2 big tomatoes cut into thick round circles
3-4 green chillies slit (depending on your spice intake)
1/2 fresh lemon squeezed to get juice.

Method:
  • Place the cooked roasted beef with the gravy in a pan.
  • On top of it, place the onions and tomatoes and the slit green chillies.
  • Adjust the seasoning and pour in the lemon juice.
  • On slow flame, keep mixing the onions & tomatoes into the beef till you see the tomatoes getting mushed and the onions turning slightly translucent.
  • Remove from heat and serve it with some roasted potatoes or grilled vegetables
For Beef Roast Sandwiches:
Serves : 1
Ingredients:

1 hot dog bread
1 tbsp mayonnaise
3 tbsp beef chilly
some shredded ice-berg lettuce
some shredded cheese (any cheese of your choice)

Method :
  • Cut the hot dog bread into half and apply mayonnaise on both sides.
  • On top of it, place about 3 tbsp of beef chilly
  • Sprinkle with some shredded cheese of your choice and grill it in the oven for about 5 minutes till the cheese is melted.
  • On top of the cheese, put some shredded ice-berg lettuce and serve immediately.


Wednesday, July 14, 2010

Sweet & Spicy Brinjal Pickle


One day at a friend's place, I tasted brinjal pickle. I liked the sweet and spicy taste of the pickle. I went about hunting for it in every Indian store, but I just could not find it on the counter. So, I decided to make it myself. My friend told me that it is quite a simple procedure to make this pickle and so I decided to give it a try. This is my first attempt at pickle making. The output was really good. I am definitely going to try making different types of pickles now.

Preparation Time : 1-2 hours
Makes : 500 gms bottle

Ingredients :

1/2 kg long purple brinjals / aubergines / eggplants
4 cloves of garlic
1 inch piece ginger
1 cup vinegar
1 cup vegetable oil or any refined oil
1 cup sugar
2 tbsp salt
3 tbsp red chilli powder
1 tsp turmeric powder
1 tsp mustard seeds

for the paste:
3 cloves of garlic roughly chopped
1 inch piece ginger rougly chopped
1 tsp methi seeds
1/2 tsp mustard seeds
1 tsp cumin seeds

Method :
  • Wash and dry the brinjals. Then cut them into medium size pieces. Marinate them with 1/2 tsp salt and 1 tsp chilli powder and keep aside.
  • Roughly cut the ginger and garlic and keep aside.
  • Combine all the paste ingredients together and soak it in 1 cup of vinegar for about 1 hour.
  • Strain the vinegar and keep aside and make a paste out of the residue with a little of the strained vinegar.
  • Heat 1 cup oil in a pan. Throw in the mustard seeds.
  • When they start spluttering, add the chopped ginger and garlic and sauté for a minute or two.
  • Then add the ground paste and fry it nicely for about 5 mins to take out all the raw smell of the ingredients.
  • To this add, the brinjals, salt and chilli powder and cover and cook for about 5 minutes.
  • When the brinjals get a little soft, add the sugar and the vinegar and stir nicely till the sugar is dissolved.
  • Keep the flame low and continue to cook the brinjal without covering it till the sugar dissolves completely and the brinjal are softened and the mixture has thickened.
  • Remove from heat and let it cool completely. This will take atleast 5-6 hours to cool off.
  • Then fill it in bottles or any air-tight container. Make sure you have put in sufficient oil from the pickle in the bottle so that it can be preserved for a longer time.
  • Chill it in the refrigerator and serve it with chapatis or with rice and dal.


Friday, July 9, 2010

Avocado Smoothie


Saw this recipe on my friend's blog. Always wondered how avocado smoothie would taste. But, the fruit itself is pretty bland. Was a little hesitant to even try it out first, but then finally decided to give it a try. It turned out really good. The texture was so creamy and smooth...just couldn't stop sipping it.

This recipe has taught me not to be afraid of trying out new things because sometimes, until we try, we will never know.

Grilled garlic pepper prawns


Some days back, I saw this recipe on Sanjeev Kapoor's site. Simply fell in love looking at it. So, decided to give it a try. It was a superhit. Now, I make this recipe all the time whenever I have friends over. It serves as a great appetizer.


Preparation Time : 15 minutes
Cooking Time : 10 minutes

Ingredients:

40 medium sized prawns de-veined (tail on)
4 tbsp garlic minced
salt and pepper to taste
4 tbsp lemon juice
4 tbsp jamaican rum
2 tbsp butter
1 tbsp oil

Method:
  • Heat butter and oil in a pan. When it is hot, throw in the minced garlic and sauté for a minute.
  • Then add the prawns and stir-fry on for about a minute or two on either side. Season it with salt and pepper.
  • When the prawns are almost ready, add the rum and lemon juice to it and mix it all well.
  • Serve immediately.

Sunday, June 20, 2010

Chicken 65


I have lots of fond memories about this dish. Growing up, I remember my dad used to take us out for Company picnics and one of his colleague's wife used to make this dish and get it for us to have it our way in the train. She used to make this dish so well. I have been thinking of making this dish for a long time now but always thought that it would take a lot of effort and hence simply kept forgetting about it. But, once I visited a party here in Canada, and one of the guest had made this dish. She told me a very simple way of making it and curious that I am, I immediately wanted to try it out. So, I decided to start by making a small quantity for my family and it was an instant hit. From then on, I have made this dish for several parties and have received a lot of compliments for it.

Chicken 65 is a Hyderabadi dish. It is basically a dry dish which is prepared with lots of curry leaves and lemon juice.


Preparation Time : 30 minutes + Marination time
Serves : 4

Ingredients:

500 gms. boneless skinless Chicken breasts
3 green chillies finely cut
3 tbsp hot and sweet tomato ketchup
2 tbsp oil

For the marination:
3 tbsp freshly squeezed lemon juice
11/2 tsp salt
1 tsp red chilly powder
1 tsp coriander powder
1/2 tsp turmeric powder
a few drops of orange food colour

For tempering:
3 tbsp oil
1 tsp mustard seeds
2 dried red chillies
6-8 curry leaves

Method:
  • Cut the chicken into bite sized pieces.
  • In a mixing bowl, combine all the marinade ingredients together.
  • Coat the chicken with the marinade. There should be plenty of lemon juice to coat all the chicken pieces.
  • Mix it well and cover and let this rest for about 4 hours or overnight in the fridge.
  • Grease a baking tray with a little oil and transfer the chicken pieces to the baking dish. Put this in the oven at 400 degree F for about 15 minutes in the middle rack.
  • Remove it and drain and discard all the fluid - keep only the semi cooked chicken aside.
  • For the tempering, in a small frying pan, heat oil.
  • When the oil is hot, add mustard seeds and allow it to splutter.
  • To this add 2 dried red chillies and fry for a minute.
  • Turn the heat to low and add the curry leaves and cover the pan again.
  • Allow the curry leaves to splutter.
  • Once the leaves are well fried and almost dry, remove from the heat and keep the tempering aside.
  • In a separate pan, heat 2 tbsp of oil and the semi cooked chicken pieces to it. Shallow fry for about 5 minutes.
  • When the chicken is almost done, add the finely cut green chillies to the pan and continue frying for about a minute or so.
  • Now, add the ketchup to the pan directly over the chicken and allow it to coat all the pieces well.
  • Add the tempering from the other pan to the main pan and mix it well
  • Do not overcook the chicken.
  • Serve hot either as an appetizer or with some vegetable pulao and raita.

Monday, June 7, 2010

Chilli Garlic Mushrooms


I had made fried rice one day and had some mushrooms lying in the fridge. I was wondering how to make a Chinese preparation with these mushrooms. So, I started browsing some of my friend's blogs and saw this interesting and quick recipe called Chilli Garlic Mushrooms on Sumi's blog. I had all the ingredients for it at home and hence, decided to give it a try. I must say it turned out really good and my daughter who hates mushrooms simply relished this dish.

For all who are interested, here is the link to Sumi's kitchen: Chilli Garlic Mushrooms

Sunday, June 6, 2010

Sex in a Pan


My friend had invited us to her place for her daughter's first holy communion. And one of the guests there had prepared this interesting dessert called "Sex in a Pan". For a moment, I thought to myself what a funny name for a dessert but when I digged in to it, I just couldn't stop eating and thought to myself that the name rightly suits the dessert.

I went home and was very curious to try it out. I didn't ask her how she prepared it so, I had to Google the web for "Sex in a Pan" dessert and saw a no. of links all showing me the same ingredients for preparing this dish.

"Sex in a Pan" is basically a 4 layered dessert with a rich nutty crust at the bottom, topped with cream cheese, 2 different types of pudding and finally a whipped cream layer. It is so smooth, rich and creamy that you simply can't stop eating it.

Last week, I was having a small family lunch at my place and prepared this dessert and I must say it turned out to be the icing on the cake. It turned out really well for my first attempt.

Although, you guys can Google this recipe up on the net ....I will still write it down for easy reference.

Preparation Time : 30 minutes
Makes 16 servings

Ingredients:

11/2 cup graham cracker crumbs
1/2 cup butter melted
1 cup chopped pecans
1 packet (8 0z.) cream cheese softened
4 cups of whipped topping, prepared (cool whip, divided)
3 0z. (1 pkt) of instant chocolate pudding mix
3 oz. (1 pkt) of instant vanilla pudding mix
3 cups milk
1 oz. of unsweetened chocolate (1 square) shavings
1 cup icing sugar

Method :
  • Mix the melted butter with the graham cracker crumbs and chopped pecans and pat into a 9x13 inch (22x33 cm) pan. Bake this at 350 degree F (180 degree C) till lightly brown for about 20 minutes. Let this cool off completely.
  • In a bowl, beat together, cream cheese and icing sugar to form a smooth texture. Carefully, fold in 1 cup of cool whip. Spoon this out onto the cooled baked layer.
  • Mix both the pudding mixes with milk and beat as per the package directions. Let this pudding thicken and then pour it on the second layer.
  • Finally, put the remainder of the cool whip on top of the pudding and swirl the melted chocolate throughout the topping.
  • Cover this with a cling wrap tightly and refrigerate it overnight.
  • Cut into rectangle slices and eat it up.

Note: Instead of graham cracker crumbs, you can also use all purpose flour and instead of pecans, you could use walnuts if you like.

Butter Chicken Rolls


I was having a party at my house last Saturday and one of the dishes I made was butter chicken. While making this dish, I had a lot of chicken which I had grilled and so decided to keep some apart. Then I thought to myself, why not try making butter chicken rolls with them. That's how I got the idea of making butter chicken rolls and I came out with this recipe...


Makes: 4-5 rolls

Ingredients:

200 gms boneless chicken breasts cut into small pieces
half of ice-berg lettuce sliced
1 small onion chopped
salt to taste
green chilli sauce
Butter
4-5 Hot dog bread rolls

for the chicken marinade:
1 tbsp lime juice
1 tsp chilli powder
1 tbsp vegetable oil
1/4 cup plain yoghurt beaten well
1/2 tsp garam masala powder
1 tsp ginger garlic paste
1/2 tsp turmeric powder

Method:
  • Mix all the marinade ingredients together in a bowl and combine it with the chicken pieces. Leave this in the refrigerator overnight or for about 5 hours
  • Preheat the oven to 400 degree F and broil the chicken in a baking tray till the chicken is cooked and you see nice charcoal marks on the chicken.
  • Let it cool for a while and then shred the chicken pieces. Add a little salt to taste
  • Take one hot dog bread and cut it into half. Butter it on both sides.
  • Place some lettuce and chopped onions in the centre of the roll and on top of it place some of the grilled shredded chicken. Add a tbsp of green chilli sauce on it.
  • Carefully, close it and and warm the roll in the preheated oven for about 3 minutes
  • Cut it into half and eat it immediately.


Friday, May 21, 2010

Caramelized Butternut Squash


I saw this recipe on Martha Stewart's show and found it quite interesting. Also very easy to make. I prepared it last week and everyone enjoyed it a lot. So sharing it with all of you.

Preparation Time : 10 minutes
Cooking Time : 20 minutes

Ingredients:

1 pound butternut squash peeled and cut into cubes
1 tbsp unsalted butter
1/2 cup chicken stock
1/4 cup water
1 tbsp brown sugar
salt and pepper to taste

Method:

  • Heat a pan and brown the butter. Be careful not to burn it while browning.
  • To this brown butter, add the cubed butternut squash and keep stirring till the butternut squash is tender and coated in butter for about 15 minutes.
  • Then add the chicken stock, water and brown sugar.
  • Cook till all the water is evaporated.
  • Season with salt and pepper.
  • Serve hot with any grilled meat or fish.

Wednesday, May 5, 2010

Kadai Paneer


A friend of mine has this very interesting food blog with a lot of mouth watering dishes. Most of them are South Indian dishes from Kerala. I was tempted to try out a few dishes from her blog. I decided to start with Kadai Paneer. This is because I had all the ingredients required for this dish at home.
I have tried making Kadai Paneer before, but I must say that this recipe is really good. I like it because it has a lot of vegetables included in it which makes the dish very nutritious. I didn't have a kadai so made it in a deep bottomed pan. My family simply enjoyed this dish.
Tuesday, May 4, 2010

Mexican Chili

This is a Mexican dish and I always wanted to know how it tastes. I had seen Chef. Roger Mooking prepare this dish on his show "Everyday Exotic". It looked really yummy. Well, I didn't follow his recipe completely. I used the ready made chili mix available in the supermarket and also incorporated a few of my own ingredients. To my surprise, it turned out really good. I prepared this dish and shared it with one of my friend who has tasted Mexican Chili before and she told me my dish was very close to what she had eaten and that she liked my dish a lot.

So, here is the recipe for all who would like to try it out.


T

Preparation Time : 20 minutes
Cooking Time : 2 hours

Serves : 6-7

Ingredients :

21/2 pounds of lean ground beef
1 packet of Old El Paso chili mix or any other brand
1 bottle of dark beer
250 gms of canned kidney beans drained and rinsed
1 onion finely chopped
2 cloves garlic chopped
1 red bell pepper finely chopped
1 big tomato finely chopped
250 gms of chunky hot mexican salsa
2 tbsp paprika
2 tbsp cayenne pepper
3 tbsp chili flakes
1 tsp roasted cumin powder
1 tsp coriander powder
salt to taste
pepper to taste
2 cups beef stock
2 tbsp oil
3 tbsp chopped coriander leaves.

Method :

  • Heat 1 tbsp oil in a pan, place the beef in it and cook it till all the moisture has evaporated and the beef is browned. You can do this in batches.
  • Drain out the excess fat and deglaze the pan with half a bottle of beer. Add this to the beef and keep aside.
  • In another pan, heat 1 tbsp oil and add garlic, onion and fry for about 5 minutes till the onions have turned slightly pink. Then, add the bell peppers and sauté for about 5 minutes.
  • To this add the hot Mexican salsa and the chili mix and cook for another 2 minutes. Pour the remaining half bottle of beer to this and cook for about 5 minutes.
  • Combine this with the beef mixture, add all the remaining spices, the beef stock and cover and cook on low flame for about 1 hour 15 minutes. Keep stirring in between, so that it doesn't stick to the pan.
  • After 1 hour 15 minutes, add the kidney beans to the beef and mix well and cover and cook again for another 15 minutes.
  • Finally, adjust the seasoning if required and remove from heat and garnish with chopped coriander leaves.
  • Serve hot with garlic bread.


Thursday, April 22, 2010

Patrani Machi


These past few days, I have been simply trying out recipes from other blogs and from other food websites. I am really amazed to find a lot of interesting recipes on some blogs. Also, I have come across some familiar recipes with a simpler way to prepare them. One such recipe is Patrani Machi. My eldest sister's mother-in-law used to make this recipe all the time when I used to visit my sister at Colaba, Mumbai. I simply loved this dish, but I always found it to be very tedious to make it at home on my own. Firstly, finding banana leaves, then wrapping the fish in these leaves, then tying them up with a thread and finally steaming then. I found it easy to go to sister's place and eat it rather than prepare it at home :)

Last week, I was browsing through hypercity website...this is a hypermarket in Mumbai which I normally visit when in India. I found the simpler way of making Patrani Machi on their website. They suggested making it with ice-berg lettuce. When I read the recipe, my husband immediately told me that it would not taste nice with the lettuce leaves. But, I decided to give it a try and made this recipe with Halibut fish. It came out so good that one could not find any difference between the traditional way of preparing this and using ice-berg lettuce to prepare it. I took a few pictures of the dish just before baking it. Then, when it was ready to take out from the oven, we were so excited to eat it that I simply forgot to take any pictures. However, I had a few last pieces remaining and took a quick picture of it. The picture might not look appetizing but believe me, this dish is a must try. It takes only 15 minutes for preparation and 30 minutes for baking the fish.

As hyperCity has removed the recipe from their website...I am typing out the same for all of you who are interested in making this quick and easy dish.

Ingredients:

6-8 pieces of boneless skinless halibut (about 2 inch size)
8-10 big leaves of Ice-berg lettuce
oil

for the green chutney:

7 mint leaves (optional)
half a bunch of coriander leaves
3 - 4 cloves of garlic
a small piece of ginger
1/4 tsp turmeric powder
3 green chillies
1 tsp cumin seeds
11/2 tbsp grated coconut
1 tbsp lime juice
salt to taste

Method:

  • Grind all the ingredients for the chutney in a mixer to a smooth paste. Add a little water while grinding if required. The consistency of the chutney should not be too thick or too watery.
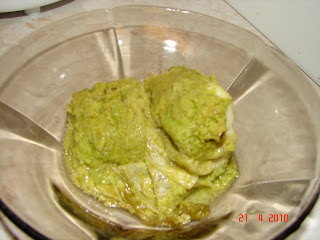
  • Apply this chutney to the halibut pieces of both sides and wrap this halibut fish in ice-berg lettuce leaf. One leaf per fish. Fold the leaf around the fish so as to make a packet as shown in the picture above.
  • Follow this procedure for all the pieces of halibut
  • Grease a baking tray with oil.
  • Place the lettuce wrapped fish in the tray and sprinkle a little oil on top of it.
  • Bake this in the oven for about 30 minutes till the fish is cooked completely.
  • You could serve this with rice and dal.
Note: The lettuce can be eaten or can be removed and kept aside. But the lettuce tastes equally good. I used halibut for this recipe but any white fish could be used for this recipe.


Monday, April 19, 2010

Egg in a Hole

This is a very interesting breakfast recipe. My friend made this one day for me and I kind of liked it a lot. I found it to be very convenient to eat as you could just eat it holding it by one hand while working on something. Kids simply love this dish. I have tested it on my kid as well as on others and found out similar reactions from all the kids.

Although I got this recipe from my friend, it is not her own creation. She found it on the net and when I did a google search, I found out innumerable ways of making this recipe. Many people like to also name it differently like Egg in a basket, Bull's eye, Egg-Hole Nest, One-eyed Susie, etc, etc...
Let me tell you how it is made and then you can decide what name you would like to give it :)


Preparation Time : 2 minutes
Cooking Time : 5 minutes

Ingredients:

1 slice of brown / white bread
1 egg
salt and pepper to taste
1 tbsp butter (depending on your taste, you could use less or more)
1 tsp oil

Method:
  • Using your knife, cut a small hole in the middle of your bread slice. You could also use any small circular object for doing this.
  • Spread the butter on both sides of the bread slice.
  • Heat oil in a non-stick pan
  • When the oil is hot, place the buttered bread slice on it.
  • Immediately, crack an egg in the hole.
  • Season it with salt and pepper to taste.
  • Let it cook for a minute or two and then flip it on the other side.
  • Cook it till it is golden brown on each side and till the egg is cooked .
  • Serve hot on a plate and eat it as it is.

I am sending this recipe to "Saving the Private Avi" project.

Egg Pakodas

Last week, I had invited a few guest over for some starters and drinks. I was wondering what starters to make for them. So, I decided to browse through the net and look out for some interesting recipes. I decided to make one starter from Chef Sanjeev Kapoor's website originally called as "Andewale Pakodas". I found it very simple to make and decided to go with it. I could make 15 pakodas easily within 20 minutes. That is really quick. So, I thought of sharing this recipe with all of you. 

Chocolate Hazelnut Cheesecake


Yesterday was my loving husband's birthday and I wanted to surprise him by making a nice cheesecake for him. I have never tried making a cheesecake before and was really very nervous about making it. So, I browsed through the net and found this Chocolate Hazelnut Cheesecake by Anna Olson from Food Network. 

Just by looking at the cake, I decided that "yes, this is it". So, I made this cake and decorated it nicely with some readily available icing and toasted hazelnuts. The only thing I skipped from the recipe was that I didn't dust the cake with cocoa powder because I found the taste just right.
Everyone who ate it simply loved it and my husband was really surprised and thrilled :)

Thursday, April 8, 2010

Sea-food platter


Some days back, I made this beautiful sea-food platter for dinner and so decided to share it with you all. The platter consists of balsamic tilapia, panko fried tilapia and stir fried shrimps in white wine along with sweet potato mash and some roasted vegetables. All these recipes are put up on the blog individually.

Spinach & Mushroom Spaghetti


I had some spinach and mushroom leftover in my fridge and was wondering what to do with it. I didn't want to make Palak paneer again and was in no mood to make mushroom masala. I wanted to make something quick and tasty at the same time. So, I simply decided to play with these vegetables and came out with my version of Spinach and Mushroom Spaghetti.


Preparation Time: 15-20 minutes
Serves : 3 Ingredients :

1/2 bunch spinach washed and blanched
40 gms spaghetti
10 mushroom chopped finely
2 thai green chillies chopped
3 cloves garlic minced
1/2 cup milk
2 tbsp all purpose flour
2 tbsp butter
2 tbsp grated mozarella cheese
salt & pepper to taste
1 tsp mixed Italian dried herbs
2 tbsp olive oil

Method :
  • Boil the spaghetti in plenty of salted water as per the packet instructions. Drain and keep aside. Add 2 tbsp of olive oil to it so that it does not stick.
  • In a blender, puree the blanched spinach along with the green chillies and a little bit of minced garlic.
  • In a pan, heat some butter and when the butter is melted, add the flour to it and cook it for about 2 minutes ensuring that there are no lumps formed. To this, add 1/2 cup milk and whisk nicely. Add salt and pepper to taste and the herbs. Finally, add the grated cheese and blend everything together by mixing it well. If the sauce is too thick, you could add a little bit more milk to it.
  • Add the spinach and chilli paste to the white sauce and mix it well. You will get a nice green coloured sauce.
  • In a pan, heat some butter and sauté the chopped mushroom adding some salt and pepper to taste.
  • Grease a baking pan with butter and spread the cooked spaghetti evenly in the pan. On top of it, pour the spinach and white sauce mixture and mix it well with the spaghetti ensuring that the spaghetti is nicely covered with the sauce. Finally, spread the sautéed mushrooms on top of it and bake it in the oven for about 10-15 minutes.
  • Serve hot with garlic bread or you could also eat it just like that.

Wednesday, April 7, 2010

My first experience on TV

You all might be wondering why I didn't post any recipes for about a month in March. This is because, I was busy shooting for a TV show called "Chef Worthy".

"Chef Worthy" is a competitive docudrama that puts amateur cooking rivals to the ultimate test; the chance to prove their salt in a top restaurant kitchen. These rivals go head to head under the watchful eye of a Master Chef - Michael Potters who will pull no punches in telling them how things are really done. Finally, these rivals will be given a big opportunity to perform in a top kitchen with 10 mystery ingredients and will have to prove their worth and be crowned CHEF WORTHY!

I was watching this show on TV....W channel some days back and then went on the internet to learn more about it. That's where I saw the application form and decided to give it a try. I went on the show with a friend of mine who is also very passionate about cooking just like me.

I will not be able to tell you all at this point, who won the challenge as the show is not yet aired on TV. It will be aired sometime in Aug-Sept and that's when you all will get to know about it. I will also put up the video on "You Tube" so that all can watch it.

I will only say that this show was really good experience for me. I got to work in a top notch restaurant kitchen and also learnt a lot from the Chef. I had to cook French cuisine, something which is not in my comfort zone but at the same time, I found it very interesting. After the show, I have been trying a lot of French recipes at home. Once, I master them perfectly, will definitely share them with all of you through my blog.

Till then....HAPPY COOKING

Balsamic Tilapia


I came across this recipe while browsing on the net through google and decided to give it a try. I was not very sure if balsamic vinegar would work well with this fish but, was very surprised to see the final result. It was very light and delicious.


Ingredients:

1 Tilapia fillet

Marinade:
1 tbsp olive oil
1 tsp lime juice
1 tsp dried oregano
1/2 tsp black pepper
1 tsp balsamic vinegar
1 tbsp finely chopped coriander leaves
1 tsp minced garlic
2 dashes of Tabasco
salt to taste

Method:
  • Put all the marinade ingredients in a jar and shake it well.
  • Pour this marinade on the fish covering it nicely and let it rest in the refrigerator for about 2 hours
  • Heat oil in a non-stick pan and shallow fry it on both sides till it slightly golden brown in colour.
  • Serve hot with sweet potato mash or any side dish of your choice.

Panko fried Tilapia


I wanted to try out different marinades for Tilapia. I had heard a lot of Panko breadcrumbs. These are basically Japanese breadcrumbs and have a nice crunchy effect. So, this is what I did with it...


Ingredients :

2 Tilapia fillets
1 tbsp light mayonnaise
1 tsp dijon mustard
salt and pepper to taste
1/2 tsp dried thyme
1/2 tsp garlic powder
1 tsp red chilli flakes
1 cup Panko bread crumbs
2 tbsp of oil
Method:
  • Clean and dry the tilapia fillets and keep aside.
  • Combine the mayonnaise and the mustard together. Add thyme, garlic powder, chilli flakes to it and rub this marinade on the tilapia fillets.
  • Let this rest for about 2 hours in the refrigerator
  • After 2 hours, bring them to room temperature.
  • In a plate, combine Panko breadcrumbs with salt and pepper.
  • Roll the tilapia fillets in the panko breadcrumbs. Ensure that they are coated with breadcrumbs on all sides.
  • Heat oil in a non-stick pan and shallow fry these panko coated tilapia fillets till you get a nice golden colour on both sides.
  • You could also bake them in the oven for about 15 minutes depending on the thickness of the fillets.
  • Serve hot with any side dish of your choice.

Stir fried Shrimps in white wine


This is one of my own creation. I got some nice big shrimps from the Chinese market some days back and wanted to do something different with it. So, I simply combined a few ingredients together and the result was just too good. So, thought of sharing this interesting shrimp recipe with you all....

Preparation time : 15 mins + 2 hours marinating
Serves : 4


Ingredients:

20 big shrimps (heads removed & de-veined)
1 tsp cayenne pepper (you could add more depending on your spice intake)
salt to taste
1/2 tsp ground black pepper
1 tbsp minced garlic
2 tbsp dry white wine
1 tbsp lime juice
2 tbsp olive oil

Method:
  • Clean the shrimps but keep the tail on.
  • Combine all the ingredients together and mix it with the shrimps and let it rest 2 hours in the refrigerator
  • In a pan, heat some olive oil. Then fry the shrimps on both sides, till you see the colour changing and the shrimps curling up slightly.
  • Alternatively, you could also grill them on the barbecue or on a grill pan.
  • Serve hot with any sides.


I am sending this recipe to Spicy Tasty's Sizzling Summer Contest - Grilled food recipes.

Sizzling Summer Contest

Thursday, April 1, 2010

Easter Eggs

Easter is a wonderful festival and is actually the most important feast in the Christian liturgical year. But, hardly people are aware of it. Everyone, thinks Christmas as the biggest Christian feast.

Growing up, my mother never really made Easter eggs at home. Nor did we have any Easter bunny hunts. I remember sometimes, my dad used to purchase these ready made Easter eggs from Monginis Cake shop and we used to be so excited to break open the egg to find some candies and small gifts inside them.

This time for Easter I decided to make Easter eggs at home. I wasn't really going to make them in the first place but then after having a chat with my friend, I got motivated to make these eggs. One of my friend's gave me the Easter egg moulds and told me how to prepare them and with some help from my hubby I was able to make these wonderful eggs. Although this is my first attempt at making them, it was lot of fun as the the whole family was involved in making it. I made two types of Easter eggs: Marzipan eggs and Chocolate Walnut eggs. So, here goes the recipe....


Marzipan Eggs:
Makes : 8-10 eggs depending on the size of the mould

Ingredients :

375 gms blanched almonds, finely ground
375 gms confectioners' sugar (also known as icing sugar)
2 tbsp egg white
3 tsp orange extract
Food coloring

Method :

  • Combine ground almonds, sugar, egg whites, orange extract in a saucepan.
  • Cook until the mixture leaves side of the pan.
  • Remove from the hot pan, and let it cool for a while.
  • Either roll the mixture into small egg shapes or put them in the ready egg shaped moulds
  • Paint with food colouring.
  • Place them on a wax paper to dry for about 3-4 hours.
  • Refrigerate them after they have dried.
Chocolate Walnut Eggs: (Makes 20 eggs)

Ingredients :

1/2 cup butter; softened
750 gms powdered sugar (icing sugar)
1/3 cup condensed milk
1 tsp vanilla essence
1/4 tsp salt
2 tbsp walnuts roughly chopped (you can use any nuts of your choice)
1 tsp maple extract (you can use any extract of your choice)
For coating them:
1 tbsp butter
250 gms dark or semisweet chocolate (I used Lindt)
Decorations (optional)

Method:
  • In a large bowl, beat the beat butter until fluffy.
  • Gradually, beat in icing sugar, condensed milk, vanilla essence and salt.
  • On a big plate, knead until the dough is smooth.
  • Then, add the chopped walnuts and the maple extract and knead again.
  • Shape into 20 eggs and refrigerator for about 1 hour or until firm
  • In a bowl over hot (not boiling)water, melt chocolate with butter; remove from heat.
  • Using two forks, dip 1 egg into chocolate to coat; shake off the excess.
  • Repeat the same with the remaining eggs.
  • Place them on a waxed paper and at this point you can add decorations to it.
  • Refrigerate them until the chocolate is set

Tuesday, March 30, 2010

Butter Chicken


Today, I was in mood to make a little exotic meal for my family. Hence, I decided to make lemon rice with butter chicken. This recipe is very simple and easy to make and very delicious. It tastes great with naan but I made lemon rice with it which also is a good combination.

Preparation Time : 30 minutes + 5 hrs marination
Serves : 4

Ingredients:

500 gms boneless chicken

for the marinade:
2 tbsp lime juice
1 tbsp chilli powder
1 tbsp vegetable oil
1/2 cup plain yoghurt beaten well
1 tsp garam masala powder
1 tbsp ginger garlic paste
1/2 tsp turmeric powder

for the gravy :

11/2 cup tomato puree
1 medium onion finely chopped
1 tsp ginger garlic paste
1 tsp red chilli powder
1 tsp cumin powder
1 tsp coriander powder
1 tsp garam masala powder
1 tbsp cashewnut powder
1 tsp dried fenugreek leaves (kasuri methi powder)
1/2 cup heavy cream
3 tbsp butter
salt to taste
2 tbsp chopped coriander leaves

Method :
  • Clean and cut the chicken into medium pieces and keep aside.
  • In a bowl, mix all the marinade ingredients together and pour it over the chicken pieces. Mix well and let it rest in the refrigerator for about 5 hours or overnight
  • After 5 hours, bring the chicken to room temperature
  • Put the chicken pieces (brushing off the excess marinade) on a baking tray and roast them in the oven @ 400 degree F for about 15 minutes till the chicken has got a burnt colour but not cooked thoroughly.
  • In a pan, melt 2 tbsp butter. Add onions and fry nicely for about 5 minutes till the onions are translucent. Then, add the ginger garlic paste and fry for another minute.
  • To this add, the cumin powder, coriander powder, red chilli powder, garam masala powder and fry again for about 5 minutes.
  • Then, add the tomato puree, the leftover marinade and bring the gravy to a boil.
  • To this gravy, add the roasted chicken pieces and cook till the chicken is done.
  • Then add the cashewnut powder, kasuri methi and mix well.
  • Finally, add the cream and butter and give it a good stir
  • Garnish with coriander leaves and serve hot with naan or lemon rice.

Lemon Rice


Today, I made butter chicken and lemon rice. But, this lemon rice is quite different from the traditional one. The traditional one has peanuts, whole red chillies and in some cases even lentils. I wanted to keep it simple. So, this is what I did...

Ingredients:

1 cup basmati rice
2 cups chicken stock
zest of one lemon
juice of 1/2 lemon
salt to taste
1/2 tsp turmeric powder

Method :

  • In a pan, combine basmati rice, chicken stock, lemon zest, salt, lemon juice, turmeric powder and cover and cook till the rice is done
  • When the rice is cooked, fluff it with a fork and serve it with any gravy of your choice.

Rosemary Cookies


While watching Food Network one day, I came across this interesting recipe by Laura Calder called "Lavender Sables". I was so tempted to make them at home. Lavender Sables are basically lavender cookies. Now, I didn't have lavender with me, so I decided to put dried rosemary into these cookies and they turned out quite well. So, for all who are interested in this recipe...here goes the link

http://www.foodnetwork.ca/ontv/shows/French-Food-at-Home/recipe.html?dishID=8287&titleid=105739

Friday, March 26, 2010

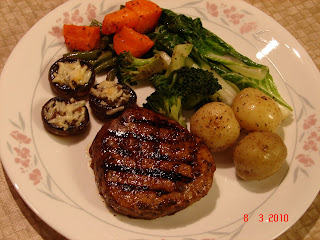
Grilled Steak with Stuffed Mushrooms and Mixed Veggies


Some time back, I was longing to eat grilled food. But, here in Canada, eating out is pretty expensive. So, I decided to have restaurant style grilled steak at home. I went to the grocery store and picked up 3 pieces of eye of round. Usually, the eye of round is a solid piece also known as the bottom round which is used to make roasts or steaks. I also purchased a marinade to go with it and then put all the ingredients together to make this lovely meal. I was very surprised as my imagination and creativity turned out into a delicious continental meal. So, here goes the recipe for all the steak lovers ....

Ingredients :

for the steak:
1 eye of round beef
1 tbsp of Roasted garlic & peppers rub marinade ( I used the Club House La Grille brand)

for the sides:
3 mushrooms
3 baby potatoes
5 brocolli florets
a few brench beans
1 carrot
3 bok choy leaves
1 tbsp chopped garlic
salt and pepper to taste
1 tsp fresh rosemary herbs
2 tbsp parmesan cheese
olive oil

Method :
  • Rub the marinade on the eye of round nicely on both sides and cover with a cling wrap and refrigerate for about 6 hours.
  • After six hours, allow the meat to come to room temperature.
  • Then lightly brush the grill pan with olive oil and grill the meat on both sides till it is brown and then cook it in the oven at 400 degree F for about 15 minutes till the meat is medium well done.
  • In the meantime, heat some oil in a pan. Add the brocolli, french beans and carrots and steam it. Add salt and pepper to taste.
  • In another pan, boil the potaotes till they are half cooked. Then put the potatoes with the skin in a pan. Drizzle generous amount of olive oil, salt, pepper and rosemary herbs. Roast the potatoes in the oven at 400 degree F for about 10-15 minutes.
  • Heat oil in the same pan. Add the garlic, and the bok choy and stir fry for 4 minutes. Season with salt and pepper to taste.
  • Cut the stems of the mushroom and chop them finely. Take a pan. Heat butter in it and add garlic and fry for a few seconds. Then add the mushroom stems and fry again for a minute or two. Take it out and keep aside. In the same pan, fry the whole mushroom for a minute and take it out. Now, put the mushroom and garlic filling inside the whole mushroom and top it with grate parmesan cheese and put it in the oven till the cheese melts.
  • Now plate everything starting with one piece of steak in the centre, and the other vegetables on the side.


I am sending this recipe to Spicy Tasty's Sizzling Summer Contest - Grilled food recipes.

Sizzling Summer Contest

Strawberry Lassi


"Lassi" is cool yoghurt drink, very refreshing especially during summers. But, I like to have it during anytime of the year. Last, week, I made two types of lassi: Strawberry lassi and plain yoghurt lassi. So, here is the recipe...


Preparation Time: 5 minutes
Serves : 4 glasses

Strawberry Lassi:
Ingredients:

1 cup Fresh Strawberries chopped
1 1/2 cups plain yogurt
1 cup crushed ice
3 tbsp sugar or as per taste

Method :

  • Mix the strawberries, yoghurt, crushed ice and sugar in the blender to a fine puree. If it is too thick, you could add some water to it.
  • Pour in a glass and serve chilled.
Note: For plain lassi, just add all the ingredients except strawberries and prepare in the same manner.

Tuesday, March 23, 2010

Balsamic Strawberry Sundae


During my visit to the supermarket, I picked up strawberries as my daughter simply loves eating them. Everyone, loves strawberries and cream but I want to do a little more with these delicious strawberries. So, after a little thought, I came out with my very own version of Balsamic Strawberry Sundae.

Preparation Time : 10 minutes
Serves : 3

Ingredients :

10 medium strawberries, chopped
1 tbsp balsamic vinegar
2 tbsp lemon juice
1 tbsp powdered sugar
2 drops of vanilla essence
3 scoops of french vanilla ice-cream

Method :

  • In a bowl, combine strawberries, balsamic vinegar, lemon juice, sugar, vanilla essence and mix well.
  • Take the serving bowl, and put one scoop of vanilla ice-cream in it. Then pour 2 tbsp of balsamic strawberry mixture on it.
  • Repeat the same for the remaining 2 scoops of ice-cream
Note : You could also add chopped nuts of your choice if you like

Thursday, March 11, 2010

Naan


I love ordering naan in restaurants and thought why not try making them at home. So, the day I made malai koftas, I decided to make naan with it as this is a good combination. The recipe for making naan is very simple and within a few hours, you will be able to enjoy restaurant style naan at home.


Preparation time : 15 minutes + 4 hours for the dough to rise
Makes : 6 Naans

Ingredients :

2 cups all purpose flour
3/4 cup water
2 tbsp oil
21/2 tbsp plain yogurt
1 tsp sugar
1 tsp salt
1 tsp baking soda
1 tsp instant yeast
2 tbsp melted butter

Toppings :

2 tbsp minced garlic
2 tbsp freshly chopped coriander leaves

Method:

  • First dissolve the yeast in water and keep aside for a while
  • In the meantime, combine flour, salt, sugar, baking soda and mix well.
  • To the dry ingredients, add the wet ingredients i.e yogurt, oil and the yeast mixture and knead well to form a soft dough.
  • Cover this dough with a cling wrap and keep aside for 3 -4 hours.
  • After 4 hours, you will see that the dough has risen and has almost become double in quantity.
  • Add a little flour to the dough and make 6 big balls.
  • In the meantime, pre heat the oven at 500 degree F for about 30 minutes
  • Roll them out in a rectangle shape to 1/4 inch thickness. Do not make them very thin.
  • Prick them with a fork so that they don't rise while baking in the oven.
  • Add your favourite toppings on top of the naan and put them in the oven.
  • You could put 2 or 3 naans at a time adding your favourite toppings
  • It should take about 3 minutes to get the naan ready.
  • As soon as they are out from the oven, brush them with some melted butter
  • Serve them hot with any gravy of your choice.