Thursday, April 22, 2010

Patrani Machi


These past few days, I have been simply trying out recipes from other blogs and from other food websites. I am really amazed to find a lot of interesting recipes on some blogs. Also, I have come across some familiar recipes with a simpler way to prepare them. One such recipe is Patrani Machi. My eldest sister's mother-in-law used to make this recipe all the time when I used to visit my sister at Colaba, Mumbai. I simply loved this dish, but I always found it to be very tedious to make it at home on my own. Firstly, finding banana leaves, then wrapping the fish in these leaves, then tying them up with a thread and finally steaming then. I found it easy to go to sister's place and eat it rather than prepare it at home :)

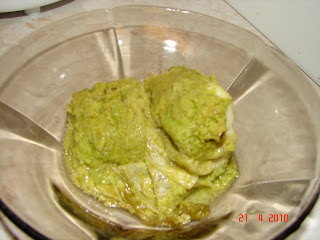
Last week, I was browsing through hypercity website...this is a hypermarket in Mumbai which I normally visit when in India. I found the simpler way of making Patrani Machi on their website. They suggested making it with ice-berg lettuce. When I read the recipe, my husband immediately told me that it would not taste nice with the lettuce leaves. But, I decided to give it a try and made this recipe with Halibut fish. It came out so good that one could not find any difference between the traditional way of preparing this and using ice-berg lettuce to prepare it. I took a few pictures of the dish just before baking it. Then, when it was ready to take out from the oven, we were so excited to eat it that I simply forgot to take any pictures. However, I had a few last pieces remaining and took a quick picture of it. The picture might not look appetizing but believe me, this dish is a must try. It takes only 15 minutes for preparation and 30 minutes for baking the fish.

As hyperCity has removed the recipe from their website...I am typing out the same for all of you who are interested in making this quick and easy dish.

Ingredients:

6-8 pieces of boneless skinless halibut (about 2 inch size)
8-10 big leaves of Ice-berg lettuce
oil

for the green chutney:

7 mint leaves (optional)
half a bunch of coriander leaves
3 - 4 cloves of garlic
a small piece of ginger
1/4 tsp turmeric powder
3 green chillies
1 tsp cumin seeds
11/2 tbsp grated coconut
1 tbsp lime juice
salt to taste

Method:

  • Grind all the ingredients for the chutney in a mixer to a smooth paste. Add a little water while grinding if required. The consistency of the chutney should not be too thick or too watery.
  • Apply this chutney to the halibut pieces of both sides and wrap this halibut fish in ice-berg lettuce leaf. One leaf per fish. Fold the leaf around the fish so as to make a packet as shown in the picture above.
  • Follow this procedure for all the pieces of halibut
  • Grease a baking tray with oil.
  • Place the lettuce wrapped fish in the tray and sprinkle a little oil on top of it.
  • Bake this in the oven for about 30 minutes till the fish is cooked completely.
  • You could serve this with rice and dal.
Note: The lettuce can be eaten or can be removed and kept aside. But the lettuce tastes equally good. I used halibut for this recipe but any white fish could be used for this recipe.


Monday, April 19, 2010

Egg in a Hole

This is a very interesting breakfast recipe. My friend made this one day for me and I kind of liked it a lot. I found it to be very convenient to eat as you could just eat it holding it by one hand while working on something. Kids simply love this dish. I have tested it on my kid as well as on others and found out similar reactions from all the kids.

Although I got this recipe from my friend, it is not her own creation. She found it on the net and when I did a google search, I found out innumerable ways of making this recipe. Many people like to also name it differently like Egg in a basket, Bull's eye, Egg-Hole Nest, One-eyed Susie, etc, etc...
Let me tell you how it is made and then you can decide what name you would like to give it :)


Preparation Time : 2 minutes
Cooking Time : 5 minutes

Ingredients:

1 slice of brown / white bread
1 egg
salt and pepper to taste
1 tbsp butter (depending on your taste, you could use less or more)
1 tsp oil

Method:
  • Using your knife, cut a small hole in the middle of your bread slice. You could also use any small circular object for doing this.
  • Spread the butter on both sides of the bread slice.
  • Heat oil in a non-stick pan
  • When the oil is hot, place the buttered bread slice on it.
  • Immediately, crack an egg in the hole.
  • Season it with salt and pepper to taste.
  • Let it cook for a minute or two and then flip it on the other side.
  • Cook it till it is golden brown on each side and till the egg is cooked .
  • Serve hot on a plate and eat it as it is.

I am sending this recipe to "Saving the Private Avi" project.

Egg Pakodas

Last week, I had invited a few guest over for some starters and drinks. I was wondering what starters to make for them. So, I decided to browse through the net and look out for some interesting recipes. I decided to make one starter from Chef Sanjeev Kapoor's website originally called as "Andewale Pakodas". I found it very simple to make and decided to go with it. I could make 15 pakodas easily within 20 minutes. That is really quick. So, I thought of sharing this recipe with all of you. 

Chocolate Hazelnut Cheesecake


Yesterday was my loving husband's birthday and I wanted to surprise him by making a nice cheesecake for him. I have never tried making a cheesecake before and was really very nervous about making it. So, I browsed through the net and found this Chocolate Hazelnut Cheesecake by Anna Olson from Food Network. 

Just by looking at the cake, I decided that "yes, this is it". So, I made this cake and decorated it nicely with some readily available icing and toasted hazelnuts. The only thing I skipped from the recipe was that I didn't dust the cake with cocoa powder because I found the taste just right.
Everyone who ate it simply loved it and my husband was really surprised and thrilled :)

Thursday, April 8, 2010

Sea-food platter


Some days back, I made this beautiful sea-food platter for dinner and so decided to share it with you all. The platter consists of balsamic tilapia, panko fried tilapia and stir fried shrimps in white wine along with sweet potato mash and some roasted vegetables. All these recipes are put up on the blog individually.

Spinach & Mushroom Spaghetti


I had some spinach and mushroom leftover in my fridge and was wondering what to do with it. I didn't want to make Palak paneer again and was in no mood to make mushroom masala. I wanted to make something quick and tasty at the same time. So, I simply decided to play with these vegetables and came out with my version of Spinach and Mushroom Spaghetti.


Preparation Time: 15-20 minutes
Serves : 3 Ingredients :

1/2 bunch spinach washed and blanched
40 gms spaghetti
10 mushroom chopped finely
2 thai green chillies chopped
3 cloves garlic minced
1/2 cup milk
2 tbsp all purpose flour
2 tbsp butter
2 tbsp grated mozarella cheese
salt & pepper to taste
1 tsp mixed Italian dried herbs
2 tbsp olive oil

Method :
  • Boil the spaghetti in plenty of salted water as per the packet instructions. Drain and keep aside. Add 2 tbsp of olive oil to it so that it does not stick.
  • In a blender, puree the blanched spinach along with the green chillies and a little bit of minced garlic.
  • In a pan, heat some butter and when the butter is melted, add the flour to it and cook it for about 2 minutes ensuring that there are no lumps formed. To this, add 1/2 cup milk and whisk nicely. Add salt and pepper to taste and the herbs. Finally, add the grated cheese and blend everything together by mixing it well. If the sauce is too thick, you could add a little bit more milk to it.
  • Add the spinach and chilli paste to the white sauce and mix it well. You will get a nice green coloured sauce.
  • In a pan, heat some butter and sauté the chopped mushroom adding some salt and pepper to taste.
  • Grease a baking pan with butter and spread the cooked spaghetti evenly in the pan. On top of it, pour the spinach and white sauce mixture and mix it well with the spaghetti ensuring that the spaghetti is nicely covered with the sauce. Finally, spread the sautéed mushrooms on top of it and bake it in the oven for about 10-15 minutes.
  • Serve hot with garlic bread or you could also eat it just like that.

Wednesday, April 7, 2010

My first experience on TV

You all might be wondering why I didn't post any recipes for about a month in March. This is because, I was busy shooting for a TV show called "Chef Worthy".

"Chef Worthy" is a competitive docudrama that puts amateur cooking rivals to the ultimate test; the chance to prove their salt in a top restaurant kitchen. These rivals go head to head under the watchful eye of a Master Chef - Michael Potters who will pull no punches in telling them how things are really done. Finally, these rivals will be given a big opportunity to perform in a top kitchen with 10 mystery ingredients and will have to prove their worth and be crowned CHEF WORTHY!

I was watching this show on TV....W channel some days back and then went on the internet to learn more about it. That's where I saw the application form and decided to give it a try. I went on the show with a friend of mine who is also very passionate about cooking just like me.

I will not be able to tell you all at this point, who won the challenge as the show is not yet aired on TV. It will be aired sometime in Aug-Sept and that's when you all will get to know about it. I will also put up the video on "You Tube" so that all can watch it.

I will only say that this show was really good experience for me. I got to work in a top notch restaurant kitchen and also learnt a lot from the Chef. I had to cook French cuisine, something which is not in my comfort zone but at the same time, I found it very interesting. After the show, I have been trying a lot of French recipes at home. Once, I master them perfectly, will definitely share them with all of you through my blog.

Till then....HAPPY COOKING

Balsamic Tilapia


I came across this recipe while browsing on the net through google and decided to give it a try. I was not very sure if balsamic vinegar would work well with this fish but, was very surprised to see the final result. It was very light and delicious.


Ingredients:

1 Tilapia fillet

Marinade:
1 tbsp olive oil
1 tsp lime juice
1 tsp dried oregano
1/2 tsp black pepper
1 tsp balsamic vinegar
1 tbsp finely chopped coriander leaves
1 tsp minced garlic
2 dashes of Tabasco
salt to taste

Method:
  • Put all the marinade ingredients in a jar and shake it well.
  • Pour this marinade on the fish covering it nicely and let it rest in the refrigerator for about 2 hours
  • Heat oil in a non-stick pan and shallow fry it on both sides till it slightly golden brown in colour.
  • Serve hot with sweet potato mash or any side dish of your choice.

Panko fried Tilapia


I wanted to try out different marinades for Tilapia. I had heard a lot of Panko breadcrumbs. These are basically Japanese breadcrumbs and have a nice crunchy effect. So, this is what I did with it...


Ingredients :

2 Tilapia fillets
1 tbsp light mayonnaise
1 tsp dijon mustard
salt and pepper to taste
1/2 tsp dried thyme
1/2 tsp garlic powder
1 tsp red chilli flakes
1 cup Panko bread crumbs
2 tbsp of oil
Method:
  • Clean and dry the tilapia fillets and keep aside.
  • Combine the mayonnaise and the mustard together. Add thyme, garlic powder, chilli flakes to it and rub this marinade on the tilapia fillets.
  • Let this rest for about 2 hours in the refrigerator
  • After 2 hours, bring them to room temperature.
  • In a plate, combine Panko breadcrumbs with salt and pepper.
  • Roll the tilapia fillets in the panko breadcrumbs. Ensure that they are coated with breadcrumbs on all sides.
  • Heat oil in a non-stick pan and shallow fry these panko coated tilapia fillets till you get a nice golden colour on both sides.
  • You could also bake them in the oven for about 15 minutes depending on the thickness of the fillets.
  • Serve hot with any side dish of your choice.

Stir fried Shrimps in white wine


This is one of my own creation. I got some nice big shrimps from the Chinese market some days back and wanted to do something different with it. So, I simply combined a few ingredients together and the result was just too good. So, thought of sharing this interesting shrimp recipe with you all....

Preparation time : 15 mins + 2 hours marinating
Serves : 4


Ingredients:

20 big shrimps (heads removed & de-veined)
1 tsp cayenne pepper (you could add more depending on your spice intake)
salt to taste
1/2 tsp ground black pepper
1 tbsp minced garlic
2 tbsp dry white wine
1 tbsp lime juice
2 tbsp olive oil

Method:
  • Clean the shrimps but keep the tail on.
  • Combine all the ingredients together and mix it with the shrimps and let it rest 2 hours in the refrigerator
  • In a pan, heat some olive oil. Then fry the shrimps on both sides, till you see the colour changing and the shrimps curling up slightly.
  • Alternatively, you could also grill them on the barbecue or on a grill pan.
  • Serve hot with any sides.


I am sending this recipe to Spicy Tasty's Sizzling Summer Contest - Grilled food recipes.

Sizzling Summer Contest

Thursday, April 1, 2010

Easter Eggs

Easter is a wonderful festival and is actually the most important feast in the Christian liturgical year. But, hardly people are aware of it. Everyone, thinks Christmas as the biggest Christian feast.

Growing up, my mother never really made Easter eggs at home. Nor did we have any Easter bunny hunts. I remember sometimes, my dad used to purchase these ready made Easter eggs from Monginis Cake shop and we used to be so excited to break open the egg to find some candies and small gifts inside them.

This time for Easter I decided to make Easter eggs at home. I wasn't really going to make them in the first place but then after having a chat with my friend, I got motivated to make these eggs. One of my friend's gave me the Easter egg moulds and told me how to prepare them and with some help from my hubby I was able to make these wonderful eggs. Although this is my first attempt at making them, it was lot of fun as the the whole family was involved in making it. I made two types of Easter eggs: Marzipan eggs and Chocolate Walnut eggs. So, here goes the recipe....


Marzipan Eggs:
Makes : 8-10 eggs depending on the size of the mould

Ingredients :

375 gms blanched almonds, finely ground
375 gms confectioners' sugar (also known as icing sugar)
2 tbsp egg white
3 tsp orange extract
Food coloring

Method :

  • Combine ground almonds, sugar, egg whites, orange extract in a saucepan.
  • Cook until the mixture leaves side of the pan.
  • Remove from the hot pan, and let it cool for a while.
  • Either roll the mixture into small egg shapes or put them in the ready egg shaped moulds
  • Paint with food colouring.
  • Place them on a wax paper to dry for about 3-4 hours.
  • Refrigerate them after they have dried.
Chocolate Walnut Eggs: (Makes 20 eggs)

Ingredients :

1/2 cup butter; softened
750 gms powdered sugar (icing sugar)
1/3 cup condensed milk
1 tsp vanilla essence
1/4 tsp salt
2 tbsp walnuts roughly chopped (you can use any nuts of your choice)
1 tsp maple extract (you can use any extract of your choice)
For coating them:
1 tbsp butter
250 gms dark or semisweet chocolate (I used Lindt)
Decorations (optional)

Method:
  • In a large bowl, beat the beat butter until fluffy.
  • Gradually, beat in icing sugar, condensed milk, vanilla essence and salt.
  • On a big plate, knead until the dough is smooth.
  • Then, add the chopped walnuts and the maple extract and knead again.
  • Shape into 20 eggs and refrigerator for about 1 hour or until firm
  • In a bowl over hot (not boiling)water, melt chocolate with butter; remove from heat.
  • Using two forks, dip 1 egg into chocolate to coat; shake off the excess.
  • Repeat the same with the remaining eggs.
  • Place them on a waxed paper and at this point you can add decorations to it.
  • Refrigerate them until the chocolate is set